
What is CamRanger?
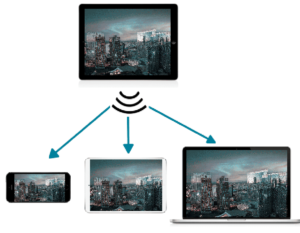
CamRanger has revolutionized architectural photography by providing remote control and enhanced functionalities, making it a must-have tool for professionals in this field. Whether it’s capturing intricate details or grand structures, the convenience and precision it offers significantly elevate the quality of architectural photographs. In simple terms, it’s a remote control that allows you to capture your photos via mobile, tablet, or laptop remotely.
CamRanger 1 vs. CamRanger 2
CamRanger 1
The original CamRanger was a game-changer in the world of photography, particularly for architectural and real estate photographers. It offered wireless control of DSLR cameras via a mobile app, allowing photographers to adjust settings, capture images, and even focus remotely. It is connected via its own Wi-Fi network, ensuring a stable connection without the need for an internet connection.
CamRanger 2
Building upon the success of its predecessor, the CamRanger 2 is faster, has a longer range, and supports Sony and Fuji cameras. It introduced additional functionalities with improved software and a built-in SD card. With advancements in technology, CamRanger 2 offers faster and more reliable connections, which are crucial for high-demand photography scenarios.
Quick Start Guide for CamRanger
- Setup: Connect the CamRanger to your camera’s USB port and establish a Wi-Fi connection between the device and your smartphone or tablet.
- Open the App: Launch the CamRanger app on your mobile device and pair it with the CamRanger hardware.
- Camera Control: Navigate through the app to control settings like aperture, shutter speed, ISO, and more.
- Live View: Utilize the live view feature to compose your shots precisely and check for focus.
- Capture: Use the app to trigger the camera shutter remotely, ensuring minimal disturbance to the setup. A 2-second delay is recommended for extra sharpness.

Benefits of CamRanger for Architectural Photography
- Remote Control: The ability to control your camera remotely is a game-changer when capturing architectural shots, especially in tricky angles or situations where physically accessing the camera is difficult.
- Live View: With CamRanger, you can see a live view of what the camera sees on your mobile device, enabling precise composition adjustments.
- Focus Stacking: For architectural photography where depth of field matters, CamRanger allows for precise focus stacking, ensuring sharpness across the entire image.
- HDR Bracketing: Capture multiple exposures easily for HDR photography, essential when dealing with varied lighting conditions in architectural settings.
- Time-Lapse and Video: Create stunning time-lapse sequences or control video recording remotely, ensuring smooth and professional footage.
Tips for Using CamRanger in Architectural Photography
- Test Before Shooting: Familiarize yourself with the device and its functionalities before your actual shoot to avoid any surprises or hiccups.
- Check Compatibility: Ensure your camera model is compatible with the specific CamRanger version you’re using. Don’t forget to choose the right USB cable.
- Stable Positioning: You can mount the CamRanger in many ways. My personal favorite is using a pouch (bag) and carabiner while attaching it to the tripod.
- Battery Backup: Keep spare batteries or a power bank handy, as continuous use of CamRanger may drain your camera’s battery.
- Experiment: Don’t hesitate to experiment with different settings and features to understand their impact on your architectural shots. Try long exposure, focus stacking, and time-lapse.
CamRanger Photo Samples
You can have a look at our Hotels and Retail Store Photography Portfolios as most of them were with the first and some on the second model